
While you can buy pre-assembled Martinez Hammers, we also offer the full self-assembly/build-your-own option.
The Martinez Modular System is designed for full customisation. This means you can hand-pick every component:
- The perfect weight head.
- The ideal handle length.
- The right head and face shape.
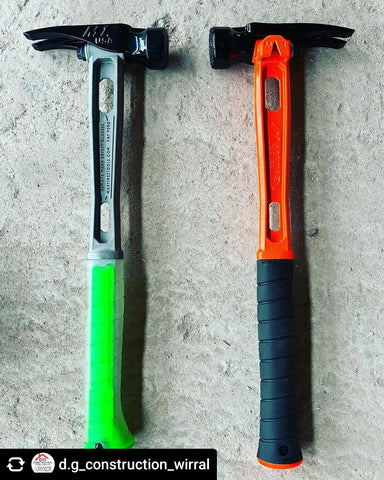
- Colourways that match your gear or company logo!
It's easy to assemble and enjoy your own custom Martinez Hammer. Here's our step-by-step guide:
How to assemble a Martinez Hammer
Building your custom Martinez hammer is a quick and straightforward process.
You will need:
- Martinez Head, Handle, and Grip
- Soft cloth or towel (to protect the paintwork)
- 3/8-inch socket or spanner
- Two Phillips head screwdrivers
- Soft faced mallet
Step 1: Remove the Head Bolt
Before you begin, remove the bolt from the hammerhead.

Step 2: Align the Dovetail
At the top of the handle, you will see a dovetail detail. This must be aligned with the corresponding dovetail slot inside the hammerhead.

Step 3: Seat the Head
To protect the finish of your hammer, place a soft cloth or towel over the head/handle connection. Using a soft faced mallet, knock the handle down into place. Make sure the point where the handle meets the head is completely "closed up" with no gaps.

Step 4: Secure the Head Bolt
Once the head is seated, insert the head bolt and screw it back into place. Martinez recommends a torque setting of 47Nm. If you don't have a torque wrench, use your judgment to ensure it is very secure. You need to tighten this bolt every few months to ensure it remains secure during use.

Step 5: Align the Grip
It is vital to put the grip on the right way around - if installed backwards, it may have to be cut off to be removed.
Hold the handle face up (head pointing away from you). The bottom of the grip should curve in the same direction. Locate the small dimple on the back of the grip; it should face the same direction as the claws/forks on the back of the hammerhead.

Step 6: Install the Grip
Push the grip onto the handle to locate it. Action: Use your soft faced mallet to strike the end of the grip until it is located fully against the handle. Ensure the hole at the bottom of the rubber grip lines up perfectly with the hole in the titanium handle.

Step 7: Secure the Grip Screw
The grip is held in place by a double-ended screw. Unscrew the two parts. Push the long post up from the bottom of the handle and drop the screw into the top hole.
Use a Phillips screwdriver to tighten it; the friction of the rubber should hold the post in place while you turn.
Final Tighten: Once the screw is mostly in, use two Phillips screwdrivers (one on the top, one on the bottom) to tighten the two halves together until the heads are sitting nicely under the surface of the rubber.

That's it! Your M1 or M4 is fully assembled and job-site ready. Now that your custom rig is built, we want to see it! Tag @tftools in your photos or use to show off your unique set up!
Looking to switch your setup or refresh your grip?
Whether you’re swapping to a different head weight for a specific job or replacing a well-worn grip, these quick videos will show you how to swap components in seconds.
How can I change my Martinez hammer head?
Just have a little look at the video by Mark Martinez:
How can I change Martinez hammer grip?
To change grip, see video by Mark of Martinez hammers
Attaching a grip - ensure you put it on the right way round as it can't be removed without cutting it off
Can't decide what grip is better for you - Curved or Straight?
Have a look at this video